 ee
eeHow Do You Make Homemade Flashcards?
If you've ever sat down with a stack of index cards and a marker, you already know the basics of study tools that have helped learners for generations. But when you dig into how do you make homemade flashcards the right way — choosing the best materials, printing crisp text, and preserving them for repeated use — there's quite a bit more to consider. Whether you're a student cramming for exams, a teacher building classroom resources, or a parent helping a child learn sight words, making high-quality homemade flashcards at home is easier than ever, especially with today's affordable printers and laminators. This guide walks you through every method, from the purely analog approach to a fully tech-assisted workflow.
Contents
What You Need to Make Homemade Flashcards
Before you start cutting and writing, it helps to think through your setup. The materials you choose directly affect how long your cards last and how effective they are as study tools. The good news is that you don't need anything exotic — most of what you'll use is already sitting in a drawer or available at any office supply store.
Basic Materials for Any Method
For a purely manual approach, you'll need index cards (3×5 or 4×6 inches are the most popular sizes), fine-tip markers or ballpoint pens in at least two colors, and optional colored stickers or tabs for categorization. A paper cutter or scissors and a ruler are useful if you're trimming cards to a custom size. Ruled index cards give you a writing guide, while blank ones are better for diagrams, vocabulary images, or language learning cards that mix text and pictures.
A small ring binder is worth picking up too — punching a hole in the corner of each card and threading them onto a binder ring keeps a deck together and lets you flip through cards quickly without shuffling loose stacks on a desk.
Optional Tech Tools That Elevate Your Cards
A home printer transforms what's possible. Instead of hand-lettering every card, you can design a template once, populate it with content, and print dozens of cards in minutes. A laminator protects the finished cards from spills, bending, and general wear, making a single set reusable for months or even years. For anyone who plans to make flashcards regularly — for a classroom, a study group, or a child who learns through repetition — the upfront investment in a good printer and laminator pays for itself quickly.
How Do You Make Homemade Flashcards Step by Step
Understanding how do you make homemade flashcards comes down to choosing the right method for your situation. Both approaches work well; the best one depends on how many cards you need, how polished you want them to look, and whether you want images on the cards.
The Classic Handwritten Method
The handwritten method is the fastest way to get started. Research on learning consistently shows that the act of writing by hand reinforces memory encoding, which means the process of making the cards is itself a study session. Here's how to do it effectively:
- Define your deck's scope. Decide what subject and how many cards you need before you start. Trying to make an open-ended deck leads to inconsistency in card size and style.
- Use the front for cues, the back for answers. The front should contain a single word, term, question, or image prompt. The back should contain the answer, definition, or explanation. Resist the urge to cram multiple facts onto one card.
- Write clearly and consistently. Use block letters or print carefully. If your handwriting is difficult to read quickly, you'll hesitate during review sessions, which disrupts your study flow.
- Color-code by category. Use a red marker for difficult cards, blue for medium, and black for easy. Or use one color per subject. This makes sorting and prioritizing fast.
- Number your deck. Write a small deck number and card number in the corner of each card (e.g., "D2 / 14"). This makes it easy to reassemble a dropped deck.
The Printed Method
If you need more than 30 or 40 cards, or if your cards need images, diagrams, or a consistent professional layout, printing is the smarter route. You can design flashcards in Microsoft Word, Google Docs, Canva, or a dedicated flashcard template. Set your page layout to print two or four cards per sheet, then cut them apart with a paper cutter for clean, straight edges. Standard 4×6 cards fit neatly on a landscape-oriented letter page, two per row, three rows per page — giving you six cards per sheet.
For language learning decks, you can include a small illustration or photo on the front of each card alongside the foreign word. For science flashcards, diagrams of cell structures, circuit diagrams, or anatomical drawings can be included without any manual drawing skill required. This is where a reliable home printer becomes genuinely valuable.
Printing Flashcards at Home
The quality of your printed flashcards depends heavily on your printer and the paper you choose. Inkjet printers are the most common home choice and handle photos and color graphics well, while laser printers produce sharper black text and are more economical for large text-heavy decks.
Choosing the Right Printer
For flashcard printing, you want a machine with at least 600 dpi resolution, reliable borderless printing (or near-borderless), and good color accuracy if your cards include images. The Canon Pixma lineup is a popular choice for home flashcard makers because the models offer excellent photo-quality output at a reasonable cost per page, and the compact footprints fit easily on a home office desk. If you already own an inkjet and the output looks muddy or streaked, check that the print heads are clean and that you're printing at "normal" or "high" quality rather than "draft" mode.
For purely text-based decks — vocabulary, math facts, historical dates — a monochrome laser printer is economical and fast. The toner bonds to the paper more permanently than inkjet ink, which matters if your cards will be handled repeatedly without lamination.
Paper and Card Stock Options
Standard 80gsm copy paper works in a pinch, but cards printed on regular paper feel flimsy and curl easily. For best results, print on 90–110gsm matte photo paper or, better still, on actual index card stock if your printer tray can handle it (check your printer's maximum paper weight specification — most home inkjets handle up to 200–280gsm). Matte surfaces are easier to write on if you plan to annotate the back of a printed front, and they don't show fingerprints the way glossy paper does.
If you print on regular paper and then laminate, the laminate film itself adds rigidity, effectively turning a thin sheet into a sturdy card. This is a cost-effective compromise: cheap paper plus a laminator equals a durable, professional-looking card.
Laminating Your Homemade Flashcards
Lamination is the single biggest upgrade you can make to homemade flashcards. A laminated card survives coffee spills, sweaty hands, and being dropped on the floor dozens of times. For cards that will be used by young children, lamination is practically mandatory.
Using a Home Laminator
A pouch laminator — the type most home users own — is simple to use. You slip your printed and cut cards into a laminating pouch (the sealed edge goes in first), run them through the heated rollers, and let them cool on a flat surface. For flashcards, 5-mil pouches are the standard choice: thick enough to add meaningful rigidity without being so stiff that the cards feel like plastic tiles. If you're laminating cards for young children who tend to bend things, step up to 7-mil.
You can fit multiple flashcards into a single large pouch as long as you leave a small gap between each card — the laminate film needs to seal around each card individually so you can cut them apart cleanly. After the pouch cools, use a paper cutter or sharp scissors to cut between the cards, leaving a 2–3mm border of laminate around each one. That border is what keeps the pouch from peeling apart at the edges. For detailed guidance on operating a specific machine, the walkthrough at how to use the Fellowes Laminator Saturn 95 covers the process step by step.
Tips for Perfect Results
Always let the laminator warm up fully before feeding in your first pouch — most machines need two to four minutes. Feed pouches straight and centered; a crooked entry often leads to wrinkled or bubbled laminate. If you see air bubbles in the finished card, your machine may be running too cool; check the temperature setting. Never stop a pouch mid-feed, as this creates a crease that cannot be removed.
After cutting, if you notice the edges have sharp corners, round them with a corner punch. Round corners not only look professional — they also prevent the edge laminate from catching and peeling during heavy use. If you're curious about the heat ranges involved and how they affect different materials, the article on how hot a laminator gets explains what's happening inside the machine during the process.
Comparing Flashcard Creation Methods
Choosing the right approach for your situation means weighing several factors: time investment, cost, durability, and suitability for different content types. The table below summarizes the key trade-offs.
| Method | Setup Time | Cost | Durability (unlaminated) | Best For | Image Support |
|---|---|---|---|---|---|
| Handwritten (index cards) | None | Very low ($3–$6 per 100 cards) | Moderate | Quick one-off decks, personal use | Limited (hand-drawn only) |
| Printed on copy paper + cut | Low (template setup) | Low (~$0.01–$0.03 per card) | Low (paper curls) | Large text-based decks | Full color photos/diagrams |
| Printed on card stock | Low | Moderate ($0.05–$0.15 per card) | Good | Professional-looking decks for classrooms | Full color photos/diagrams |
| Printed + laminated (pouch) | Moderate (laminator warm-up) | Moderate ($0.10–$0.25 per card) | Excellent (waterproof) | Long-term use, children's learning sets | Full color photos/diagrams |
| Handwritten + laminated | Low | Low-moderate | Excellent | Personal decks meant to last | Limited (hand-drawn only) |
For most home users making a deck of 50–150 cards, the printed-and-laminated method offers the best balance of quality, durability, and cost. For a student who needs 20 cards tonight before an exam, handwritten cards are perfectly effective and far faster to produce.
Tips for Making Flashcards That Actually Work
Knowing how do you make homemade flashcards physically is only half the equation. The other half is designing them so they're genuinely useful for learning. A beautifully laminated card with too much text on it is less effective than a slightly crumpled index card with a single, clear question. These principles come from decades of cognitive science research on memory and retrieval practice, summarized well in the Wikipedia article on spaced repetition.
Active Recall and Spaced Repetition
The purpose of a flashcard is to force you to retrieve information from memory rather than simply recognize it. This distinction — retrieval versus recognition — is why passive re-reading of notes is far less effective than testing yourself with cards. Each time you successfully recall an answer, the neural pathway for that information is strengthened. Each time you fail to recall it and then see the answer, the pathway is reinforced through the contrast of failure and correction.
Spaced repetition takes this further by spacing out reviews of each card based on how well you know it. Cards you find easy get reviewed less frequently; cards you struggle with get reviewed more often. You can implement a simple version of this manually using the Leitner box system: sort cards into five boxes, and review Box 1 daily, Box 2 every other day, Box 3 twice a week, and so on. Move a card forward when you answer correctly, back to Box 1 when you don't.
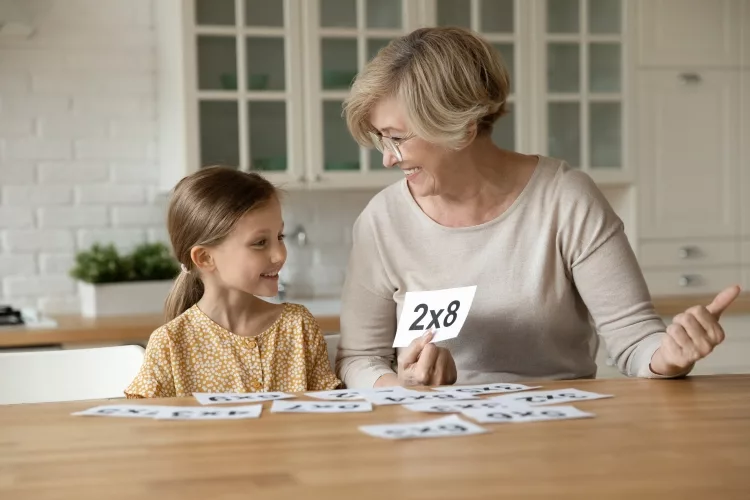
Using Images and Color Coding
The brain processes visual information significantly faster than text. Adding a small, relevant image to a flashcard — a picture of a historical figure, a diagram of a molecular structure, the flag of a country — creates a second retrieval pathway alongside the verbal one. When you can't quite recall the text answer, the image often triggers it. This is why printed cards with photo support have a genuine learning advantage over purely text-based handwritten cards for certain subjects.
Color coding by subject, difficulty, or card type is equally powerful. When your brain starts associating a certain color with a category of knowledge, sorting and selecting cards for a focused review session becomes intuitive. Use a consistent system across all your decks so the associations carry over. If you're building cards for a classroom setting where multiple students will use the same set, laminated color-coded cards are especially durable — the color won't fade or bleed even after months of handling.
If you're building an extensive library of printed study materials and want to keep digital archives of your card designs, a portable scanner is useful for digitizing handwritten cards so you can store, edit, and reprint them without redrawing anything from scratch.
Frequently Asked Questions
How do you make homemade flashcards without a printer?
The simplest method is to use ruled or blank index cards with a fine-tip marker or ballpoint pen. Write the cue or question on the front and the answer on the back. Keep each card focused on a single fact. If you want more durability without a printer, you can still laminate handwritten cards using a home pouch laminator — the result is a waterproof, long-lasting card that looks and feels professional.
What size should homemade flashcards be?
The most common sizes are 3×5 inches and 4×6 inches. The 3×5 size is compact and easy to carry in a pocket or small pouch, making it ideal for language vocabulary or math facts. The 4×6 size gives more room for diagrams, longer definitions, or bilingual content. If you're printing your cards, 4×6 is easier to fit neatly onto a standard letter-sized page.
Is it worth laminating homemade flashcards?
Yes, especially if the cards will be used repeatedly over a long period or handled by young children. Laminated cards resist spills, bending, and edge fraying. A single laminating pouch typically costs less than $0.20, which is cheap insurance for a deck you've invested time in creating. For a one-time exam cram session, lamination may not be necessary — but for classroom sets or long-term study decks, it's well worth it.
What kind of paper is best for printing flashcards at home?
For inkjet printers, 90–110gsm matte photo paper or heavy card stock gives the best combination of print quality and rigidity. Matte finishes are preferable to glossy for flashcards because they're easier to write on if you want to add notes, and they don't reflect light awkwardly during use. If you plan to laminate after printing, standard 80gsm copy paper is sufficient — the laminate film adds the needed stiffness.
Can I write on laminated flashcards?
Yes, but only with a dry-erase or wet-erase marker — regular ballpoint pens and permanent markers either don't adhere well to laminate or cannot be removed. Dry-erase laminated cards are popular for reusable practice cards, particularly for math drills where a student writes an answer, checks it, wipes it off, and repeats. If you need permanent writing on the card, write before laminating, not after.
How many flashcards should be in a study deck?
Research on working memory suggests that 20–30 cards per active study session is an effective range — large enough to provide meaningful practice but small enough to complete a full review in 10–15 minutes. If your subject requires more than 30 cards, break the deck into thematic sub-decks and rotate between them. Keeping each review session manageable prevents fatigue and maintains the active, focused attention that makes flashcard study effective.
 |
 |
 |
 |

About Rachel Chen
Rachel Chen writes about scanners, laminators, and home office productivity gear. She started her career as an office manager at a midsize law firm, where she was responsible for purchasing and maintaining all of the document handling equipment for a 60-person staff. That experience sparked a deep interest in archival workflows, paperless office setups, and document preservation. Rachel later earned a bachelor degree in information science from Rutgers University and now writes full time. She is a strong advocate for ADF reliability over raw resolution numbers and has tested every major flatbed and document scanner sold in the United States since 2018.